Globus Data Transfers
Contents
Overview
Globus lets you use a web browser or command line interface to submit transfer and synchronization requests of large data sets between the Matilda HPC and other institutions, or your local workstation.
Data are transferred directly between the source and destination systems while Globus tunes performance parameters, maintains security, monitors progress, and validates correctness. You can check the transfer status at any time via the Globus activity page and will receive email when the transfer completes.
Globus provides secure and fast file/data transfer between endpoints, and is designed to facilitate research collaboration. Additionally, Globus is geared primarily towards the transfer of large data sets rather than large or small numbers of small files.
Creating a Globus ID
To create a Globus account and ID, navigate to the GlobusID page and fill in the requested fields. You may use any email address you wish to create your Globus ID (it doesn't have to correspond to your OU email address). Whether or not you choose to associate your OU email with your Globus ID, you will still be required to go through OU's single sign on (SSO) whenever you login to the Matilda Endpoint, as we will illustrate below (you will also need authorized access to Matilda). A Globus ID is handy because it enables the user to associate multiple identities together under one ID. For example, your OU Matilda access (via your NetID) and your MSU iCER (HPCC) access. You can also use it to setup a Personal Endpoint (discussed laster) on your personal workstation(s).
Matilda Data Collections
Accessible directories within Globus are defined as "Data Collections". Matilda is configured with the following data collections:
- Matilda HPC - users home directory
- Matilda Scratch - the scratch space, accessible at either the user or project level
- Matilda Projects - the projects directory space
- Matilda Archives - special space for archival storage and Guest Collections
These are called "Mapped Collections", because each defined collection maps to a particular storage space or mount. The storage mounts that are an integral part of the Matilda Cluster are:
/home/<letter>/<username> - your home directory
- /scratch - provides spaces for user and project-related scratch
- /projects - provide spaces for project directories
The Mapped Collection "Matilda Archives" is only accessible via the mount point /archives, and only on the hpc-data node. The hpc-data node is not accessible to users via SSH, and it is used ONLY for Globus file transfers. The following sections describe standard file transfers on the Matilda Cluster for the home, projects, and scratch spaces. A discussion of archives is presented later.
Getting Started
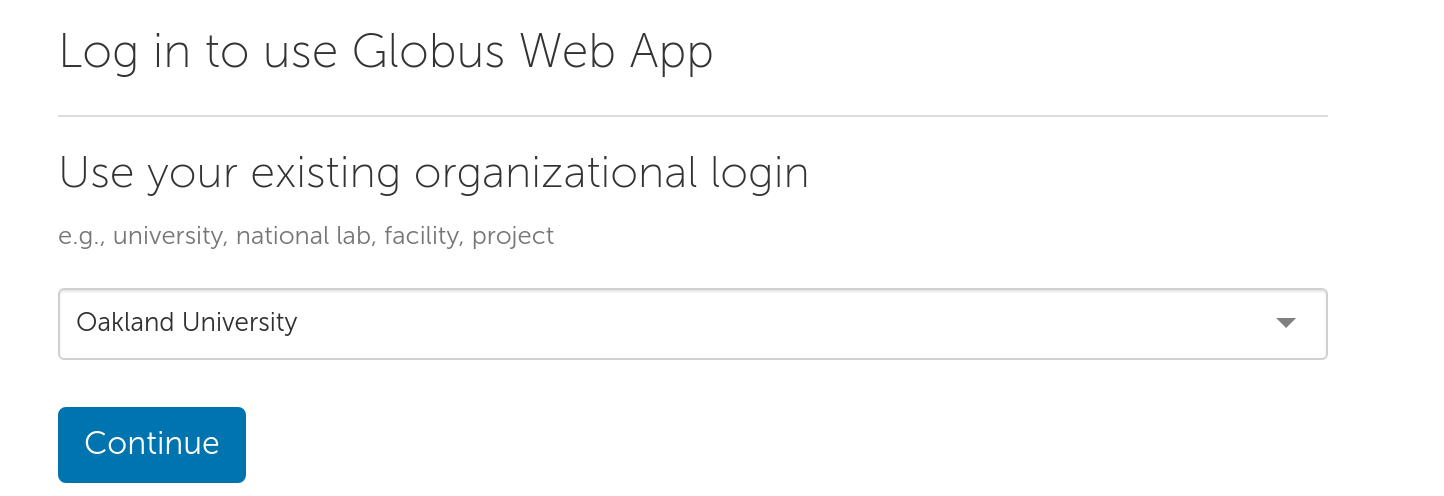
To get started using Globus on Matilda, first navigate to the Globus website, and click the "Login" button.
Next select "Oakland University" from the dropdown box, and click "Continue":
After clicking "Continue" you will be redirected to the Oakland University Login page. Enter your OU NetID and password and click "Sign In":
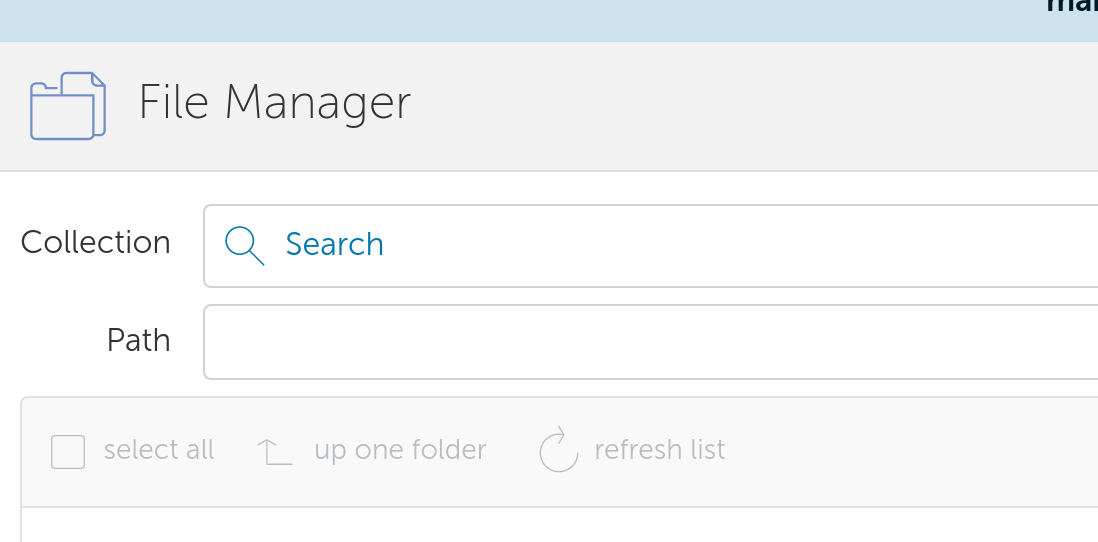
After signing-in, you will be redirected to the Globus File Manager:
At the top you will see a box labeled "Collection". To search for the available Matilda cluster collections, enter "Matilda" in the Collections box and you should see something like the following:
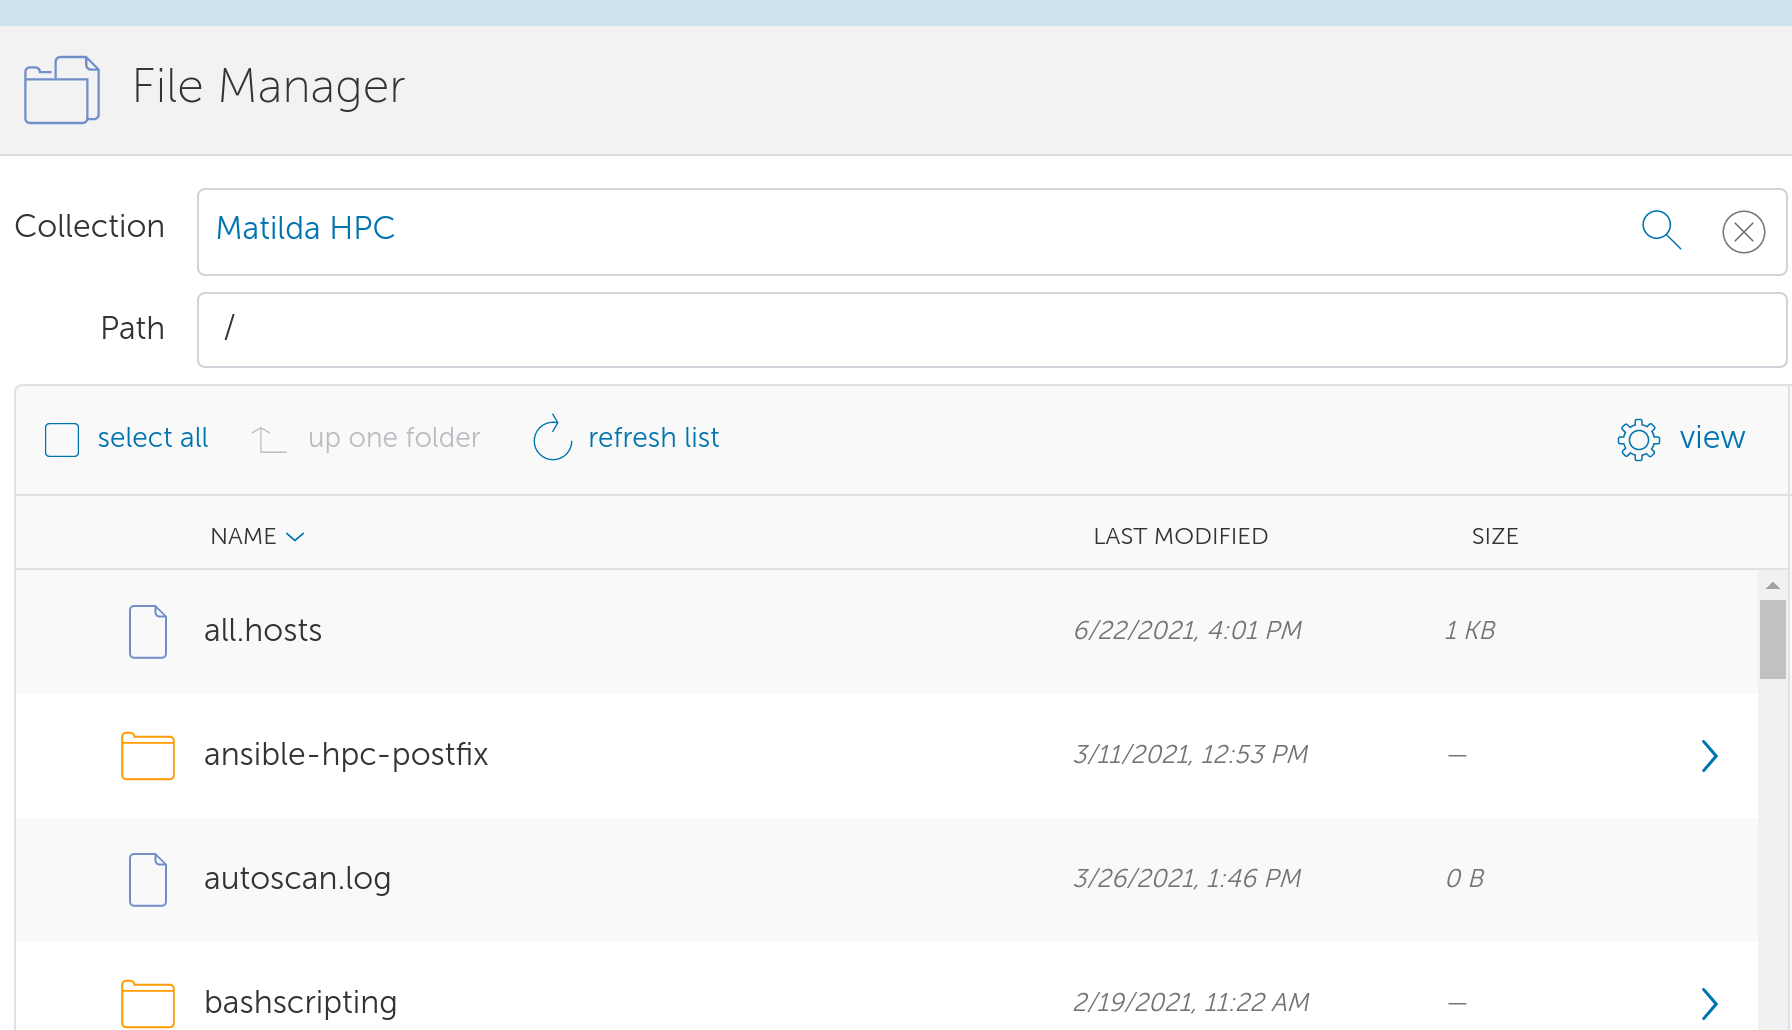
Now select the collection of interest. In this example, we will choose the "Matilda HPC" collection which corresponds to the user's home directory:
(NOTE: The first time you access a new collection, you may be asked to confirm your permission to access the collection. Please grant all suggested permissions.)
This should now show you a listing of the files and folders in your home directory.
The same procedure can be used to access the other on-cluster collections: "Matilda Scratch" and "Matilda Projects".
Note that accessing "Matilda Scratch" will take you to the root "/scratch" directory. From there, click on either the "users" or "projects" folders, and then on the corresponding user or project space. Similarly, for "Matilda Projects", you will be directed to the root "/projects" directory. From there, click on the desired project space.
File Transfers
As previously mentioned, file transfers are possible between Matilda and other institutions with publicly accessible Globus endpoints. It is also possible to transfer files between your local workstation and Matilda using Globus. The following example will illustrate a transfer between Matilda and MSU's HPCC endpoints (Please note this particular example will only work if you have an MSU HPCC user account).
With your home directory pulled up by accessing the "Matilda HPC" Collection, click on the menu item "Transfer or Sync to.." in Globus. You should now see your home directory listing in the left pane, and a "Search" box in the right pane:
Now type "MSU hpcc" in the search box in the right pane, and find iCER's MSU HPCC Collection (Note: you will be prompted to authenticate collection access using your assigned MSU NetID and password). Once selected, you should now see your Matilda home directory listing on the left, and your MSU HPCC home directory on the right:
To transfer files, click on the directory listing of the source, select the file(s) or folder(s) you wish to transfer, and simply drag them to the destination pane.
From this directory view you can delete files or folders, create folders, upload files to the data collection from your local machine, or download files from the collection to your local machine.
PLEASE NOTE: In most cases you will be provided with access to another institution's public collection (or a private share), and would search for, or directly enter the collection name to initiate transfers to or from Matilda. As of November 2022, OU does have a subscription to Globus. This means that user generated private shares from Matilda to external institutions are now possible, but only on the Archives Collection which is dicussed later. However, please note that external users cannot access the Matilda shares "Matilda HPC", "Matilda Scratch", or "Matilda Projects" without an OU NetID and a Matilda HPC account.
Globus Connect Personal
Globus Connect Personal is an application that can be downloaded to your personal workstation. Globus Connect Personal essentially creates a personal "Collection" that corresponds to your local desktop or laptop and facilitates transfers between your local workstation and another endpoint. The Globus Connect Personal website provides installation instructions for Windows, Mac, and Linux clients.
When Globus Connect Personal is first started it will ask for your login information and a name for your workstation "Collection". This will create a personal endpoint that will be active whenever Connect Personal is running. File transfers can be initiated by clicking on the Globus Connect Personal icon in the system tray, and selecting "Web Transfers". This will open a web page to Globus with your local Collection shown in the left pane. Simply search for the Collection desired in the right hand search box to select files/folders and initiate transfers.
Matilda Archives
The Matilda Archives space is designed to accommodate PI's who require archival storage space for data not commonly used in cluster job operations. In addition, it is setup to permit PI's to share data with collaborators who are not affiliated with OU via the creation of Guest Collections. Guest Collection sharing with non-OU persons is not permitted on the home, projects, or scratch spaces. Only OU users with Matilda accounts may access those data collections. However, those PI's who have made prior arrangements with UTS may request a space on /archives, and data stored therein may be shared with external OU persons. Please contact UTS for more information.
Once your /archives space is setup and data is transferred into it, you can share data with external collaborators. This is a two-part process; first, you must define the Guest Collection you wish to share, and second, establish the permissions (e.g. read only, or read/write) and persons who should have access. Once complete, a link will be generated that you can share with collaborators. An email can also be sent out by Globus to collaborators with Guest Collection information.
Creating the Guest Collection
Login to Globus and click in the "Collection" box as described previously in the Getting Started section. Begin by typing "Matilda" in the box - you should see a link for "Matilda Archives". Select that link and wait for the directory listing to be displayed.
Now navigate through the directory tree until you find the directory you wish to share (note, you cannot share a single file directly, it MUST be inside a folder).
Highlight that directory and click "Share" from the right-hand menu (middle menu if using a 2-pane layout):
Now click "Add a Guest Collection":
Fill out the details of the Guest Collection, including the "Display Name" (important!):
You can add keywords and other contact details to make the collection easier to find.
Now click "Create Collection to complete this step.
Creating Guest Collection Shares
Now that the Guest Collection has been created, you can create "shares" for collaborators. You can share with any individual, so long as that person has a valid Globus account.
To start, click "Add Permissions - Share With":
Now select the type of share desired (usually "user"). Enter the person's email address or valid Globus ID (it must correspond to a valid Globus account). Begin by typing in the Globus ID or email in this field. Valid Globus account holders will appear - select the appropriate person/account. Finally, select whether they should have read-only, or read-write permissions to your Collection, and click "Add Permission":
If the appropriate box is checked, the user will receive an email with a link. You may also show and copy the link and send it out under separate cover:
You can access and administer your Guest Collections and shares at any time, by logging into Globus and selecting the "Collections" link in the left-hand menu bar.
From this menu, you can add, remove or modify permissions on shares (the "Permissions" tab), or modify or delete Guest Collections ("Edit Attributes" or "Delete Endpoint"). You may also assign persons with valid Globus ID's various administrative rights under the "Roles" tab. Finally, you can monitor activity on the Collection by selecting the "View this Collection's Activity" button.
Accessing Guest Collections
There are a couple of ways in which your collaborators can access your Guest Collection. The first way is by simply following the provided share link and logging into their valid Globus account when prompted.
They may also login to Globus normally, and click on the menu item "Collections" followed by clicking on the tab "Shared with You" (this will provide a list of shared Guest Collections):
The third way is to begin typing the name of the Guest Collection, and/or any other keywords you've associated with it and then selecting the appropriate Collection:
Once the Guest Collection is opened and the directory listing is displayed, the collaborator may read and/or write data to or from the Collection from either their personal endpoint, or any other endpoint where they have access.
More Information on Guest Collections
Please refer to the following for more information on creating and administering Guest Collections:
Globus Documentation
The following resources may be helpful:
If you have additional questions, or if you wish to establish an Archives space, please contact UTS.
CategoryHPC


